Create a lightweight Linux router/firewall in a microVM
Turn a regular PC into a router/firewall with Slicer microVMs, using standard Linux networking daemons like dnsmasq and iptables.
In this post, I'll show you how to turn a regular PC into a router/firewall using Slicer microVMs with standard Linux networking daemons such as dnsmasq and iptables.
Why use a regular Linux VM over pfSense or OPNsense?
Whether it's based upon FreeBSD or Linux, these products are often extremely bloated, often closed source, and require a lot of resources to run. It's hard to know where to start when you need to customise these products to your own needs, and they often bundle far more than you need for a router/firewall.
Instead, we'll use a microVM that's easy to create from scratch, and can be customised as much as you need. You can then add in additional daemons or services as required like a VPN uplink, Inlets tunnels, or something like PiHole for ad blocking.
Most importantly, you'll be in control, you'll know exactly what is and what is not running in your appliance, and how to troubleshoot it or customise it - an LLM agent can help you with that if you're not used to Linux networking.
Why Slicer?
Well instead of having to flash an ISO directly to your main drive, you can run as many microVMs as you want, each performing a different task or role. One common complaint with off the shelf router/firewall products is their poor support for Linux containers. With Slicer, you can simply run an extra microVM, you're not locked into one OS or product for the whole machine.
Network Topology
                    ┌─────────────────────────────────┐
                    │           Slicer Host           │
                    │                                 │
                    │  ┌──────────────────────────┐   │
                    │  │  microVM Router/Firewall │   │
                    │  │                          │   │
                    │  │  eth0: 192.168.130.2/24  │   │
                    │  │  ──────────────────────  │   │
                    │  │                          │   │
                    │  │  ens7: 10.88.0.1/24      │   │
                    │  │  (PCI Passthrough/VFIO)  │   │
                    │  └──────────────────────────┘   │
                    │           │                     │
                    │           │ PCI Passthrough     │
                    │           │ (VFIO)              │
                    └───────────┼─────────────────────┘
                                │
                    ┌───────────┴───────────┐
                    │                       │
                    │                       │
         ┌──────────▼───────────┐ ┌─────────▼────────┐
         │       LAN1           │ │       LAN2       │
         │  (Main Network)      │ │  (Isolated)      │
         │  192.168.130.0/24    │ │  10.88.0.0/24    │
         │                      │ │                  │
         │  ┌────────────────┐  │ │  ┌─────────────┐ │
         │  │  Other Devices │  │ │  │ Raspberry Pi│ │
         │  │  (LAN1)        │  │ │  │ (LAN2)      │ │
         │  └────────────────┘  │ │  └─────────────┘ │
         │                      │ │                  │
         │  Internet Gateway    │ │  DHCP/DNS        │
         │  Router              │ │  via dnsmasq     │
         └──────────────────────┘ └──────────────────┘
The microVM router has two network interfaces:
- eth0: Connected to LAN1 (192.168.130.0/24) via bridge networking
- ens7: Connected to LAN2 (10.88.0.0/24) via PCI passthrough (VFIO)
All traffic from LAN2 must pass through the microVM router to reach LAN1 or the Internet, providing physical Layer 1 separation between the networks.
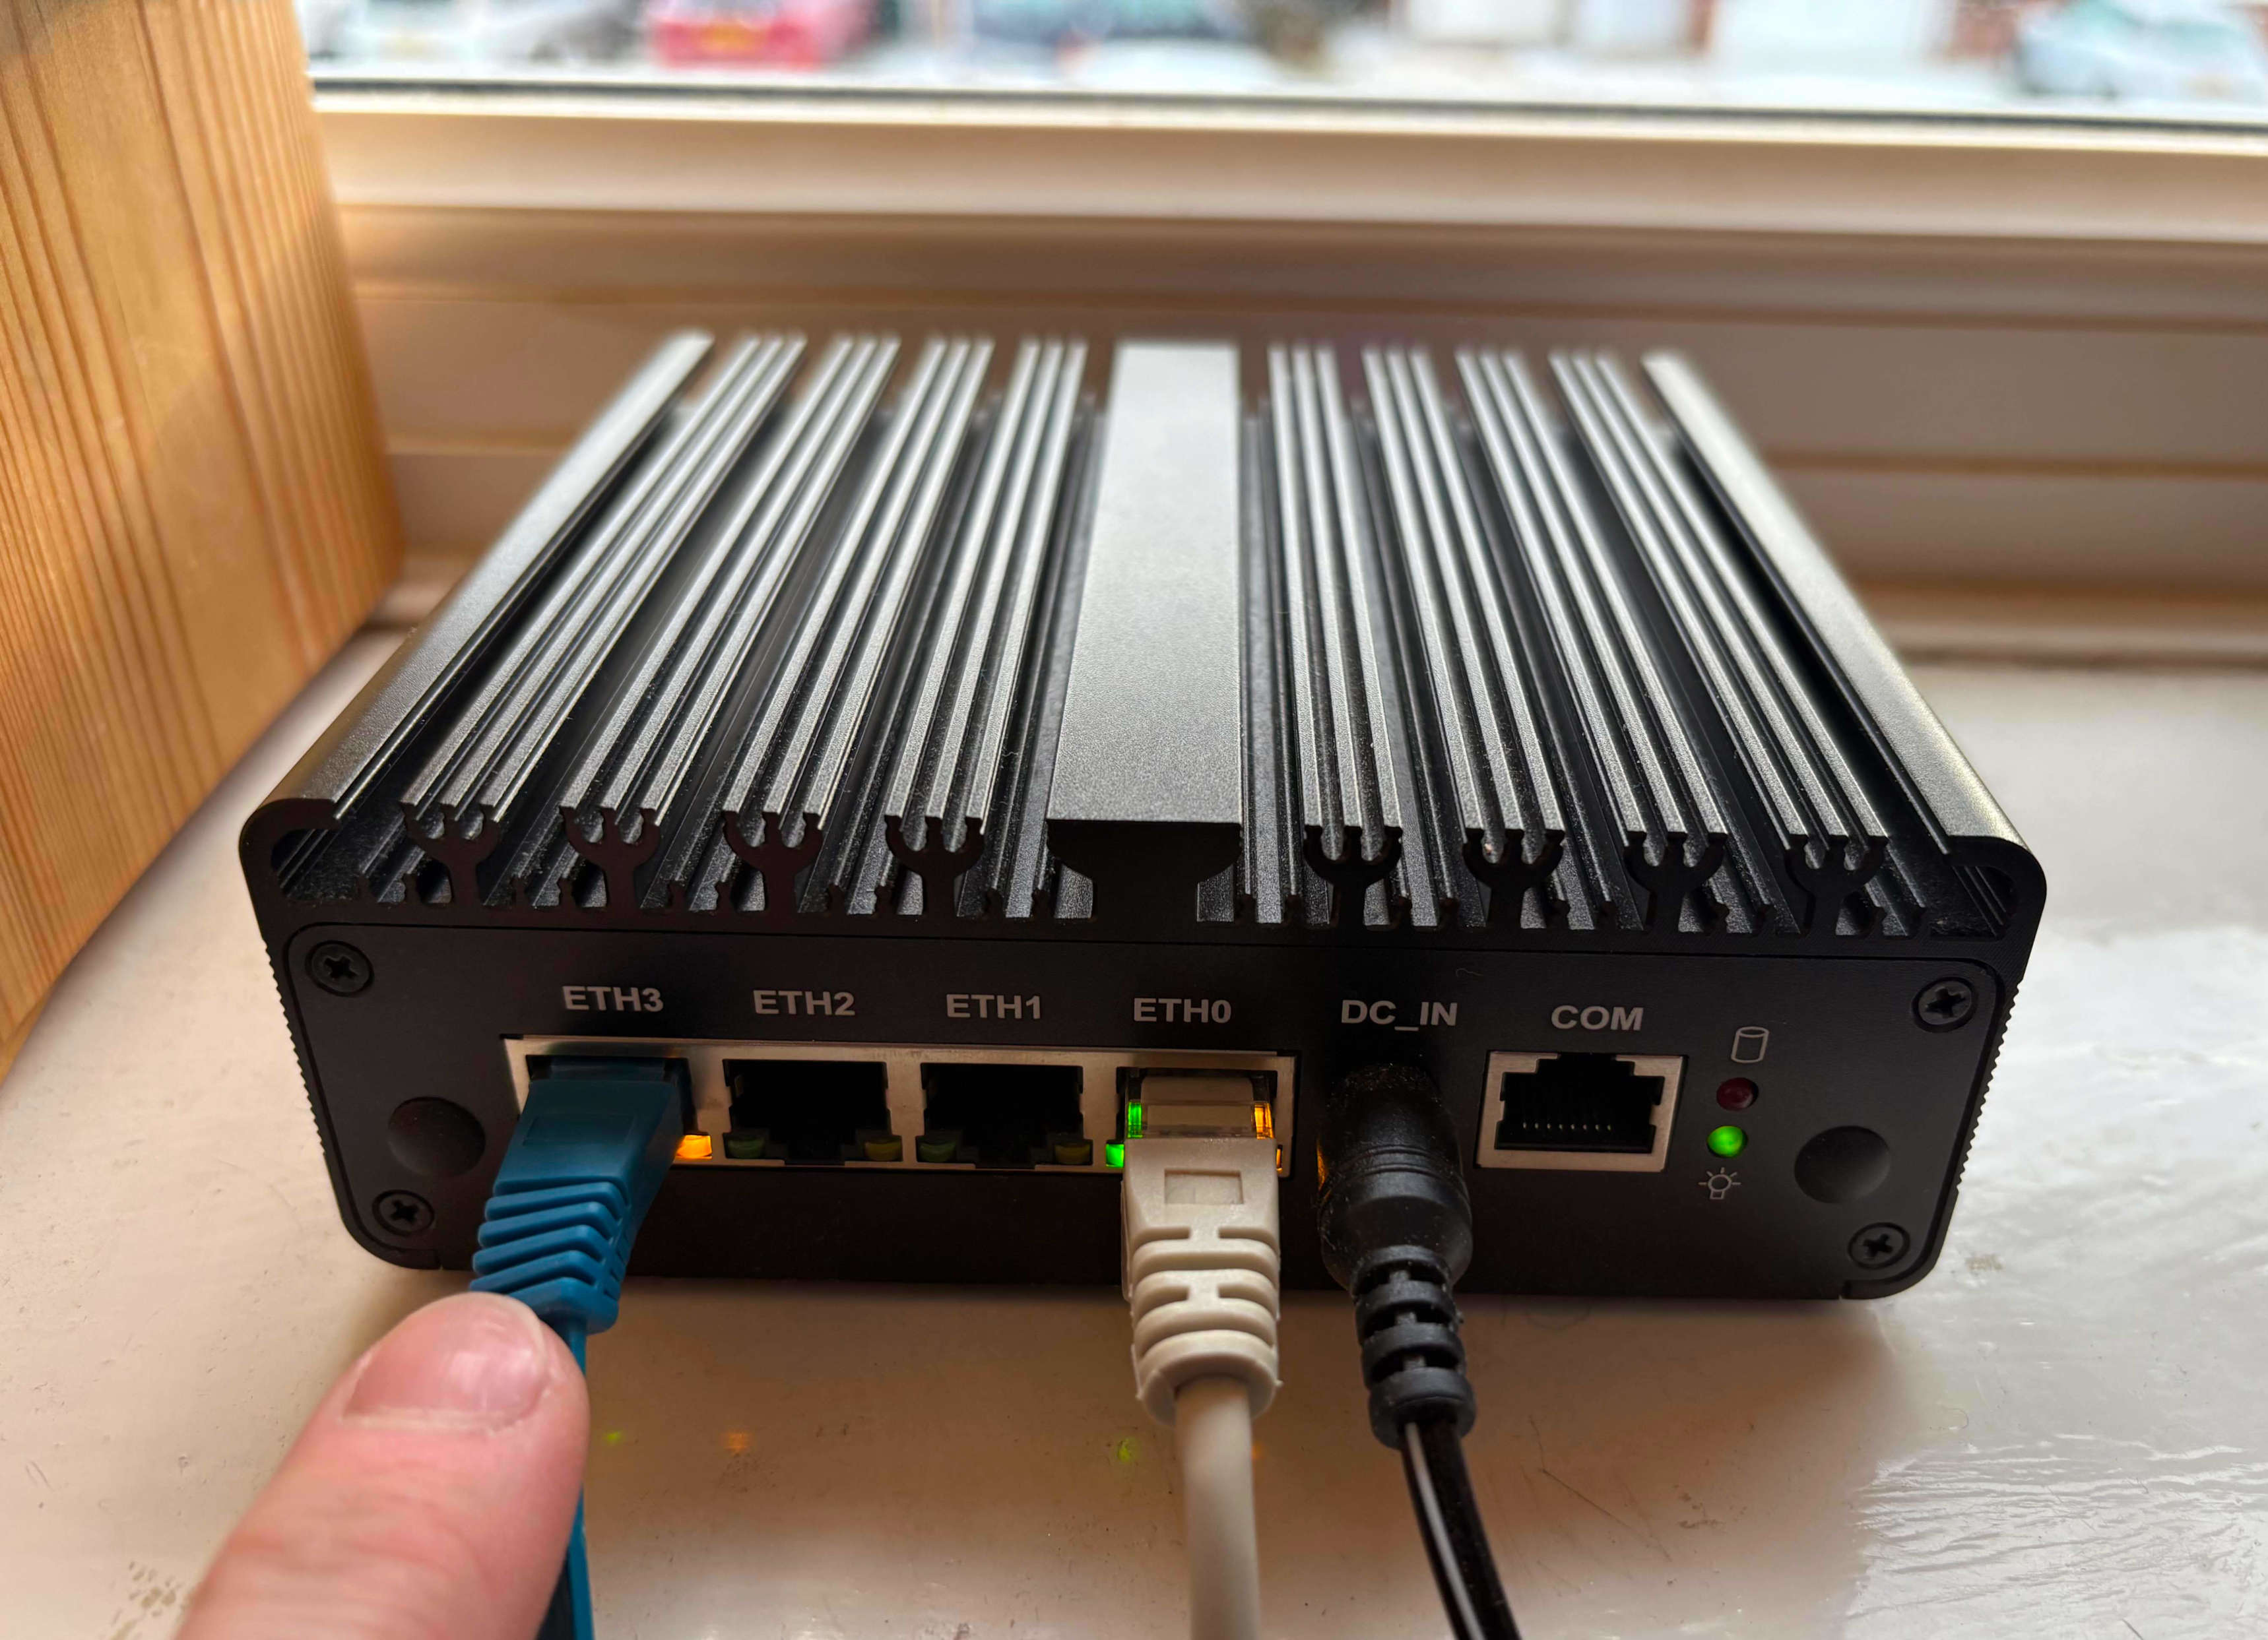
N100 mini PC routing/firewalling a separate Internal network
The Setup
You'll need to bind a PCI network adapter to VFIO for passthrough. In my case, I'm using an N100 mini PC with the PCI address 0000:04:00.0.
The Slicer config looks like this:
config:
  pci:
    router-1: ["0000:04:00.0"]

  host_groups:
    - name: router
      userdata_file: ./userdata.sh
      storage: image
      storage_size: 25G
      count: 1
      vcpu: 2
      ram_gb: 4
      network:
        bridge: brrouter0
        tap_prefix: router
        gateway: 192.168.130.1/24
  image: "ghcr.io/openfaasltd/slicer-systemd-ch:x86_64-latest"
  hypervisor: cloud-hypervisor
After booting the microVM, I discovered the PCI passthrough interface appears as ens7:
$ cat /var/log/slicer/router-1.txt
1: lo: <LOOPBACK,UP,LOWER_UP> mtu 65536 qdisc noqueue state UNKNOWN group default qlen 1000
    link/loopback 00:00:00:00:00:00 brd 00:00:00:00:00:00
2: eth0: <BROADCAST,MULTICAST,UP,LOWER_UP> mtu 1500 qdisc pfifo_fast state UP group default qlen 1000
    link/ether 2e:31:2a:ff:7d:45 brd ff:ff:ff:ff:ff:ff
    inet 192.168.130.2/24 brd 192.168.130.255 scope global eth0
3: ens7: <BROADCAST,MULTICAST,UP,LOWER_UP> mtu 1500 qdisc mq state UP group default qlen 1000
    link/ether 60:be:b4:1e:19:63 brd ff:ff:ff:ff:ff:ff
    inet 10.88.0.1/24 scope global ens7
The userdata script configures:
- dnsmasq for DHCP and DNS on the LAN2 interface
- iptables rules for forwarding and NAT masquerading
- IPv4 forwarding enabled via sysctl
The script is straightforward - it sets up the LAN interface IP, configures dnsmasq with a DHCP range (10.88.0.50-10.88.0.200), and adds iptables rules to allow forwarding from LAN2 to LAN1 with NAT masquerading.
Testing the Setup
Once the router microVM is running, I connected a Raspberry Pi to the PCI passthrough interface. The Pi receives an IP via DHCP:
$ nmap -sP 10.88.0.0/24
Starting Nmap 7.80 ( https://nmap.org ) at 2026-01-06 10:34 UTC
Nmap scan report for 10.88.0.1
Host is up (0.00041s latency).
Nmap scan report for 10.88.0.67
Host is up (0.00068s latency).
Nmap done: 256 IP addresses (2 hosts up) scanned in 2.32 seconds
From the Raspberry Pi, I can ping the router and access the Internet:
ubuntu@router-1:~$ ping -c1 10.88.0.1
PING 10.88.0.1 (10.88.0.1) 56(84) bytes of data.
64 bytes from 10.88.0.1: icmp_seq=1 ttl=64 time=0.073 ms

ubuntu@router-1:~$ ping -c1 8.8.8.8
PING 8.8.8.8 (8.8.8.8) 56(84) bytes of data.
64 bytes from 8.8.8.8: icmp_seq=1 ttl=118 time=7.51 ms

ubuntu@router-1:~$ curl google.com
<HTML><HEAD><meta http-equiv="content-type" content="text/html;charset=utf-8">
<TITLE>301 Moved</TITLE></HEAD><BODY>
<H1>301 Moved</H1>
The document has moved
<A HREF="http://www.google.com/">here</A>.
</BODY></HTML>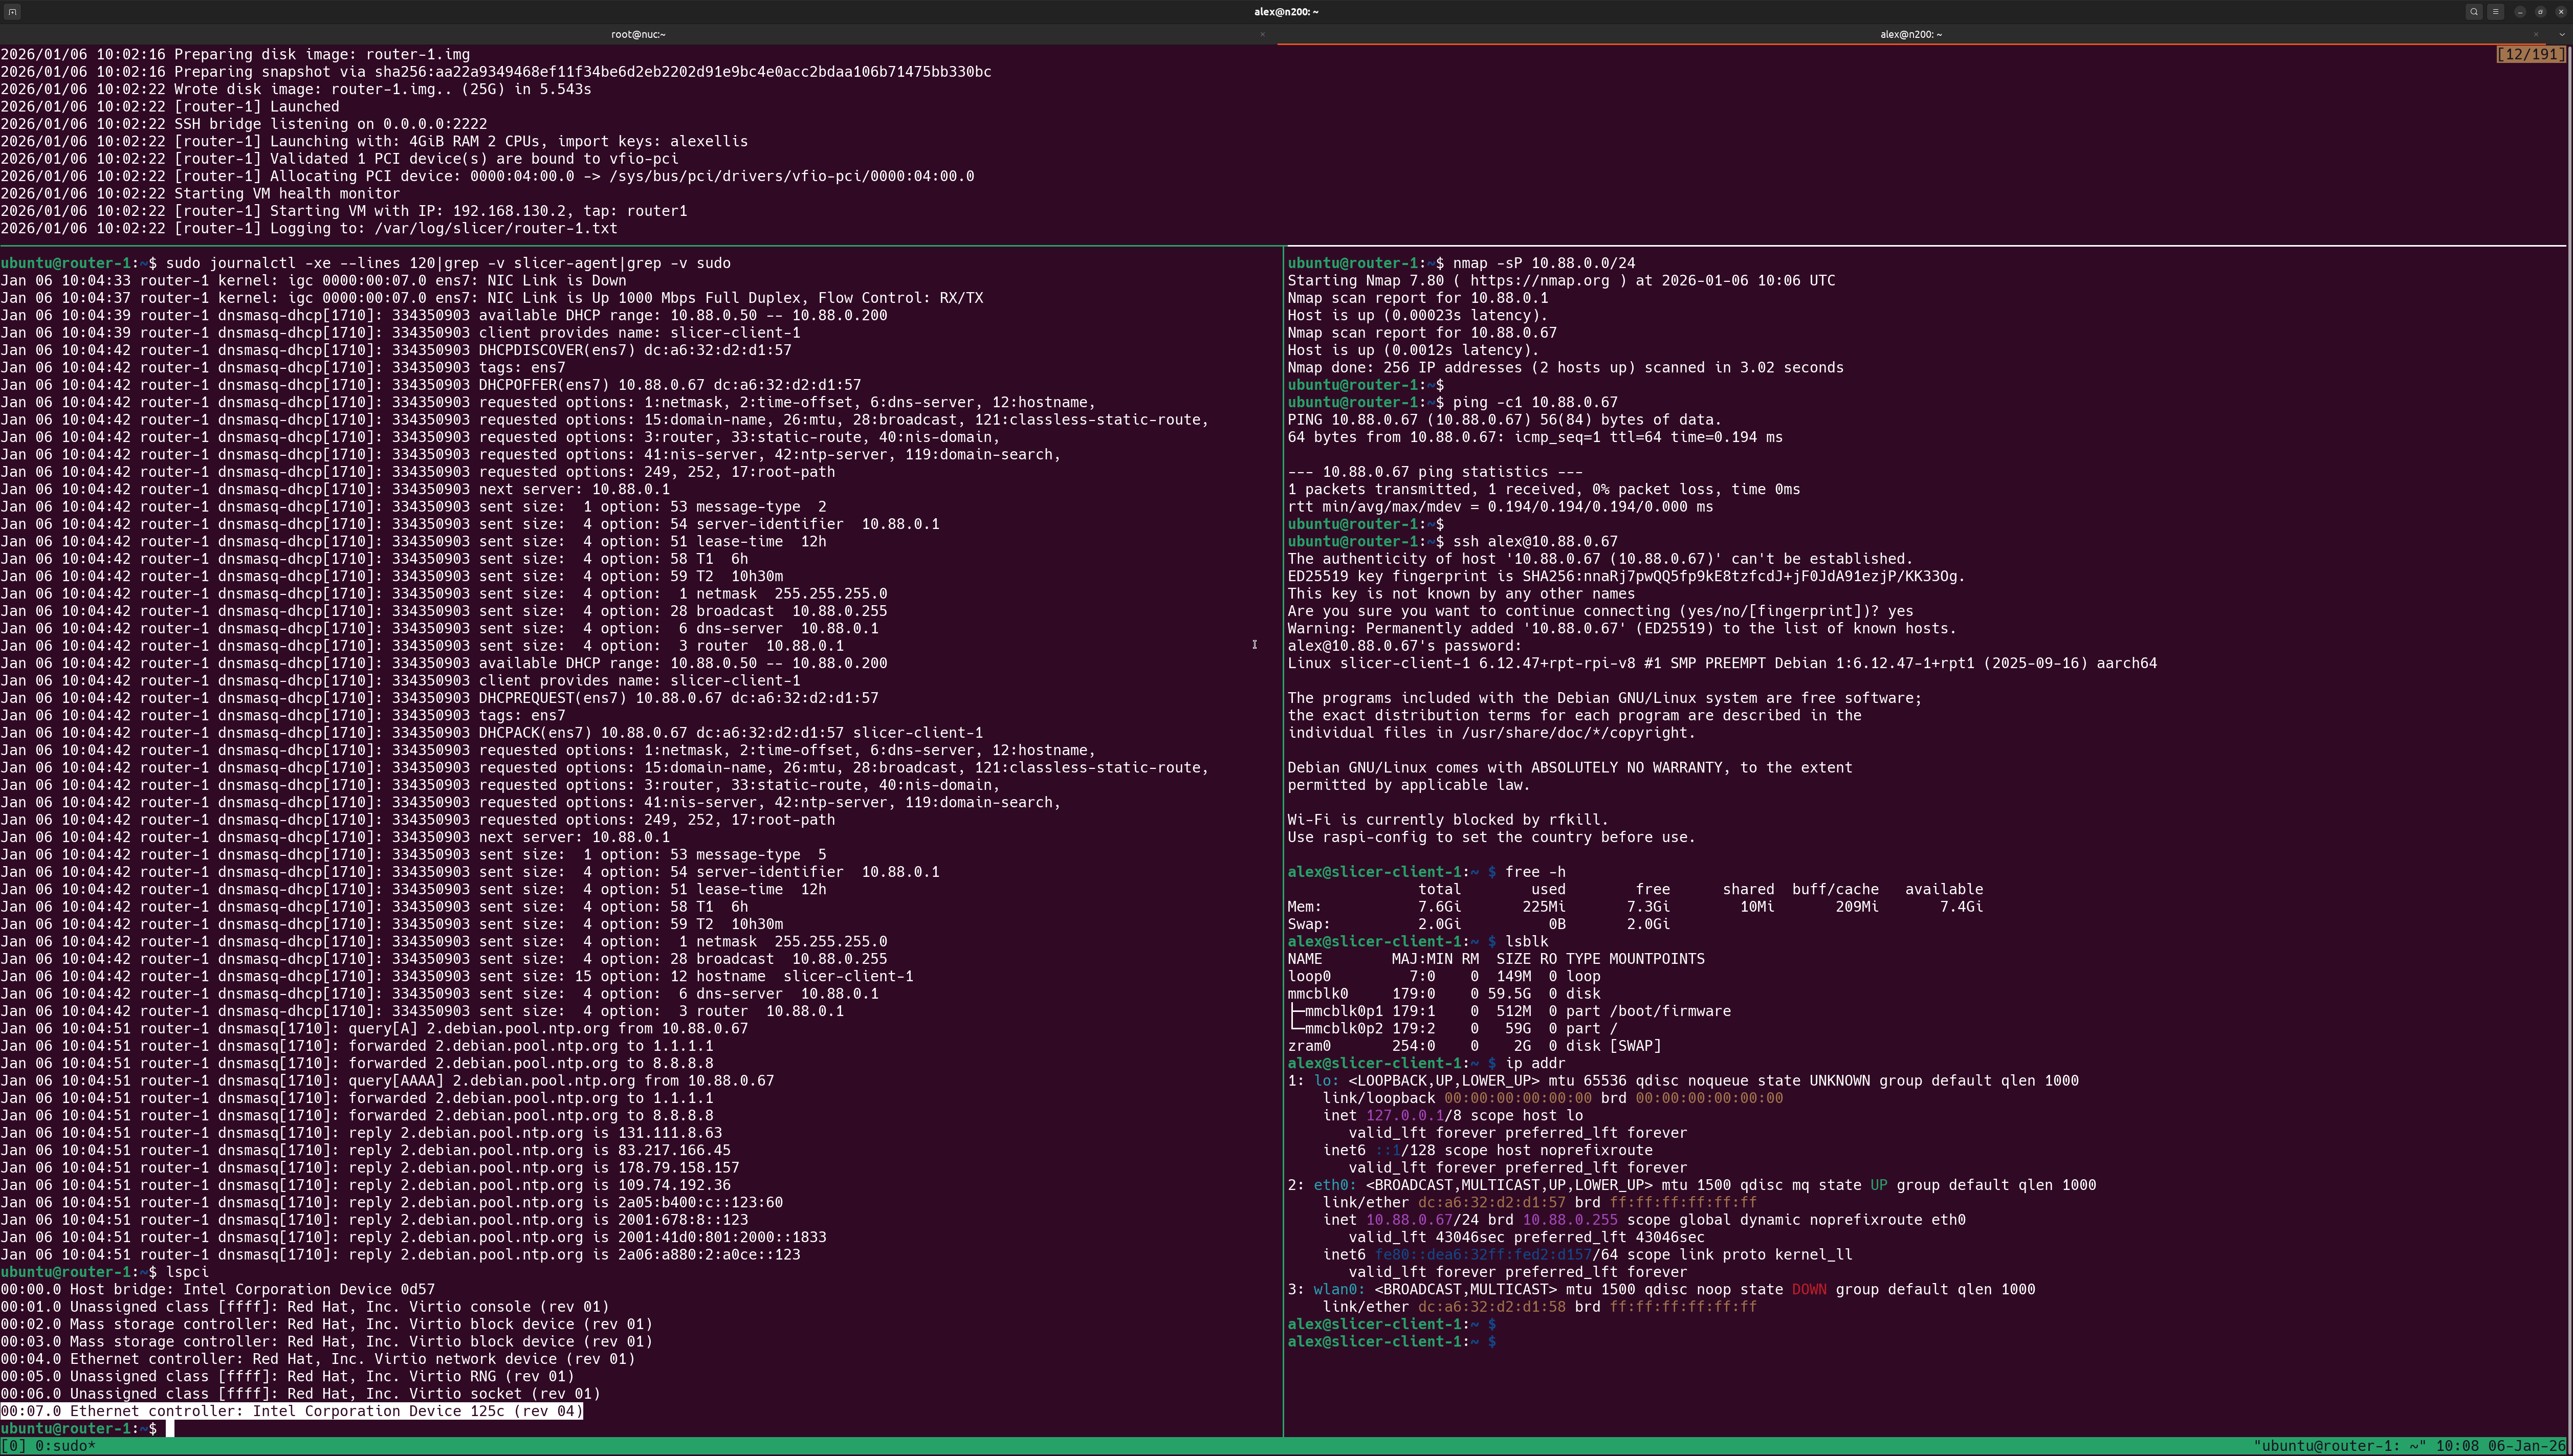
Raspberry Pi accessing the Internet via the router/firewall microVM.
Firewalling off LAN1
You can define additional iptables rules to further lock down any hosts on LAN2. For instance, you may want to block access to your main LAN (192.168.1.0/24) while still allowing Internet access and access to the router itself.
To firewall off 192.168.1.0/24 so that LAN2 only has access to the Internet and the microVM router, add this iptables rule to your userdata script before the existing FORWARD ACCEPT rules. Since iptables evaluates rules in order, the DROP rule must come before the ACCEPT rule:
# Block access to LAN1 network (192.168.1.0/24) from LAN2
# IMPORTANT: This must be inserted BEFORE the existing ACCEPT rules
# The -I flag inserts at position 1 (beginning of chain), so it's evaluated first
iptables -I FORWARD -i "${LAN_IF}" -d 192.168.1.0/24 -j DROP
Here's what the full table ends up looking like on the microVM:
root@router-1:~# iptables -L -n -v
Chain INPUT (policy ACCEPT 0 packets, 0 bytes)
 pkts bytes target     prot opt in     out     source               destination
    2   654 ACCEPT     udp  --  ens7   *       0.0.0.0/0            0.0.0.0/0            udp dpt:67
    2   134 ACCEPT     udp  --  ens7   *       0.0.0.0/0            0.0.0.0/0            udp dpt:53
    0     0 ACCEPT     tcp  --  ens7   *       0.0.0.0/0            0.0.0.0/0            tcp dpt:53

Chain FORWARD (policy ACCEPT 0 packets, 0 bytes)
 pkts bytes target     prot opt in     out     source               destination
    0     0 DROP       all  --  ens7   *       0.0.0.0/0            192.168.1.0/24
    8   608 ACCEPT     all  --  ens7   eth0    10.88.0.0/24         0.0.0.0/0
    8   608 ACCEPT     all  --  eth0   ens7    0.0.0.0/0            10.88.0.0/24         ctstate RELATED,ESTABLISHED

Chain OUTPUT (policy ACCEPT 0 packets, 0 bytes)
 pkts bytes target     prot opt in     out     source               destination
root@router-1:~#
The existing rules already handle:
- Access to the router itself (INPUT rules allow DNS/DHCP on
${LAN_IF}) - Established connections back from Internet (the existing FORWARD rule with
ESTABLISHED,RELATED)
This setup creates a Demilitarized Zone (DMZ) where devices on LAN2 can:
- Access the Internet (via NAT masquerade through
${WAN_IF}which connects to LAN1) - Access the router/firewall microVM itself (10.88.0.1) for DNS and DHCP
- Not access any devices on LAN1 (
192.168.1.0/24)
This is ideal for running servers, CI runners, and other services exposed to the Internet through tunnels such as Inlets.
Wrapping Up
You've now created a lightweight Linux router/firewall which physically isolates LAN2 from LAN1. LAN2 has its own IP range (10.88.0.0/24) and all devices must pass through the microVM to access the Internet or LAN1.
The full example with complete userdata scripts and configuration is available in the Slicer documentation.